Pages

header2

Image Map

adsense

Thursday, January 30, 2014

Valentine Cupcakes - Day 4

Today I have another applique creation!

Connie at Cranberry Ridge Design made the Cupcake Top with a lettuce edge instead of ruffles and the adorable LOVE applique!

I love the vintage look with the pearls!


And her bow is so cute!

Go check out Connie's blog and Facebook page!

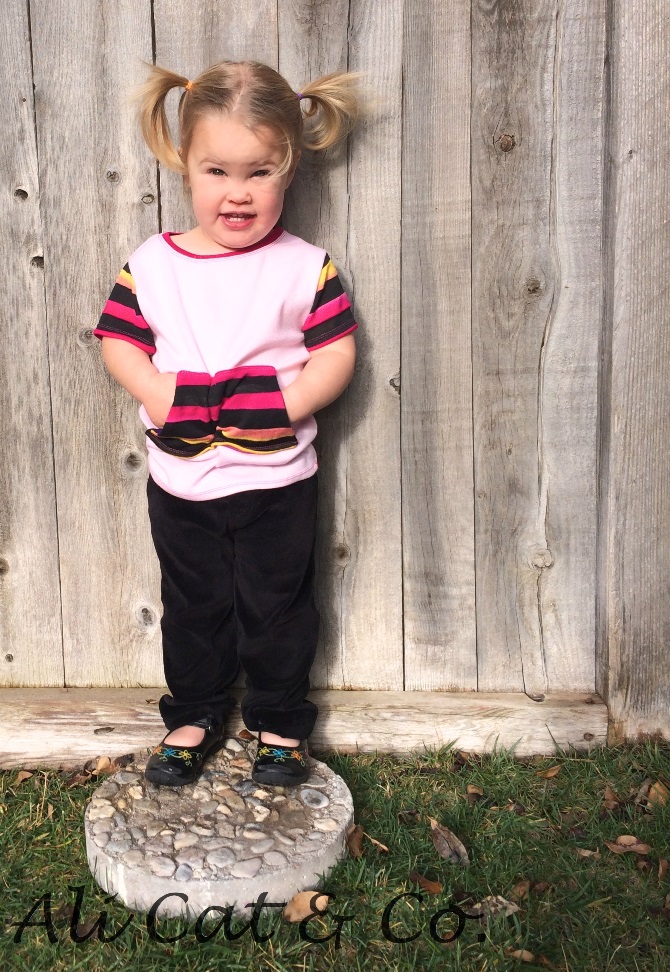
And Brianne at Ali Cat & Co. has done it again!

She thought about doing a heart cutout and then came up with the idea to make a cupcake cutout!

Her tutorial is up for you to try it yourself!


  And don't forget that the Cupcake Top is on sale for only 1 more day!  Click the SHOP  and get 20% off with the code: SWEET


Wednesday, January 29, 2014

Valentine Cupcakes - Day 3

One thing I love about blogging is meeting other girls that love to sew and developing friendships with them!  I love the creations that Jessica and Regina show on their blog and they were so sweet to post about the Cupcake Top for me during the sale!
 

And take a look at this!!!!  Jessica turned the t-shirt pattern into a pea coat for her daughter!!!  Amazing!


Check out Jessica's Blog - The Berry Bunch to read more!


And I love this adorable version that Regina at Rana Mama Design has created!  Regina was an incredible tester when I was getting the pattern ready for release!  She translated the pattern into Hungarian!  If you need/want the pattern in Hungarian make sure you purchase from Regina's site!
 
The Cupcake Top is available now in the SHOP  and this week only the pattern will be available for 20% off with the code: SWEET
 

Come back tomorrow for a few more Sweet Cupcake creations!
Már megint akcióóóó! Emlékeztek még a Cupcake Topra, amit tesztvarrtam és aminek a szabásmintáját és az útmutatóját magyarra fordítottam? Nos, mivel az általam varrt felsőn igencsak hangsúlyt kap a sok szivecske (a békákon kívül is), ezért hát a Bálint-napi hangulat (vagy inkább hangolódás) aranyos - See more at: http://ranamamadesign.blogspot.hu/2014/01/cupcake-top-valentin-napi-kulonkiadas.html#sthash.ePIWGJjQ.dpuf

Tuesday, January 28, 2014

Valentine's Cupcakes - Day 2!

It's day 2 for our Valentine Cupcake Top Show and Tell!!!  (Or, if you're in Canada like these little girls.... SNOW and tell!)


 Sheena at The Stituation used some adorable minky fabric to create her Cupcake Tops!


Her little girls are so cute! And the applique of "LOVE" and the heart cupcake are perfect for Valentine's Day parties!


I love the idea of using minky for the pattern - the fabric is so soft and warm!

Don't forget that the Cupcake Top and is available now in the SHOP for sizes 3m to 6 years and this week only the pattern will be available for 20% off with the code: SWEET
 

"Mom, stop taking pictures!!  The snow is too bright!"


Stop by tomorrow to see what Jessica and Regina have done with their Valentine inspired Cupcake Tops!!!

Monday, January 27, 2014

Valentine Cupcakes - Day 1!


Can you believe it's almost the end of the first month of 2014?!!!  I'm still trying to get used to writing "2014" instead of "2013" on papers and checks!

This last week of the month I wanted to highlight the pattern I released in December!  It's the perfect t-shirt for embroidery and embellishment!  Or, make it with the cute kangaroo pocket to keep your little one's hands warm!

The pattern is the Cupcake Top and is available now in the SHOP for sizes 3m to 6 years.  I'm working on a sizing update - watch my FB page for a tester call! (sizes 7-12)
 

Just like with the Bumblebee Dress, if you purchase now you will be sent a sizing update when all the measurements and pattern pieces are finished.  This week only the pattern will be available for 20% off with the code: SWEET


Now, let's check out what you can do with the Cupcake Top!!!  
I had several friends make the pattern without the kangaroo pocket so you could see how perfect this pattern is to create boutique shirts with applique!


Ashley's daughter is modeling this adorable version with a Valentine Peacock from Applique Junkie! 
Ashely creates the most adorable things for custom orders at Kutie Pie Creations.


I think this picture is my favorite out of all of them! LOL!

Come back tomorrow to see how Sheena at The Stituation used the pattern to make some snuggly minky Cupcake Tops for Valentine's Day!!!  I can't wait to share with you!

Tuesday, January 21, 2014

Heart applique with Blanket Stitch tutorial


I'm reposting from a guest post last year on Sumo's Sweet Stuff!  With Valentine's coming up soon, this is a simple and sweet project you can add to any existing t-shirt!
I love the look of a blanket stitch and started a Pinterest board with some projects and tutorials!

I'm taking my own spin on it and embellishing a bodysuit with a blanket stitch around an applique!  I am lucky and have an awesome embroidery machine that I usually use for appliques but I thought for the tutorial I would show you the cheap and easy way of making a quick applique!  (To see some of my cute applique items visit my facebook shop!)

Materials:
Bodysuit
Pellon Wonder Under
Fabric Scrap
Embroidery Floss
Large Eye Embroidery Needle
Applique Shape

 
I just used a simple heart shape and printed it from the computer.  Take the Wonder Under and trace the shape of your applique on to the WU
 
Cut out the WU and put it rough side down on the wrong side of your fabric scrap.  Use a hot, dry iron to fuse it to the fabric.
 
Cut out the fabric to the heart shape and gently peel the backing off the WU.
 
Place the fabric applique down on the bodysuit.  Take a damp cloth and put it on top of the applique and then use the iron to fuse the WU to the onesie.
 
Now for the fun blanket stitch embellishment!!!!

Take your embroidery floss and knot one end.  Bring up the thread from the back, back down and then up again right next to your original hole.


Take the needle and slide it through that first loop to the left.
 
Now that your thread tail is on the bottom, take the needle and point it down, making sure that the tail is underneath the needle as you pull it through.
 
Continue this stitch all the way around your applique
 
Here's what the back looks like.  When you're finished, just knot off the thread and cut.
 
Use this to embellish all sorts of projects!!!  I think the blanket stitch would also look darling around a pocket on a t-shirt or even a pair of jeans!


I hope you have fun with these options and I would love to see what you create!

Sunday, January 19, 2014

Snowflakes and Lace Round up!


We did it!!!  A whole week showcasing how lace can be used to give your sewing project that extra special touch!  Thank you to ALL of our contributors to the series!
 
Here's a round up of each project in case you missed any:
Click the links below the collage pictures!


Our winners of the giveaway have been contacted  -  Congratulations if you were one of the winners of the three prize packs!  I want to thank all of the ladies that donated the prizes as well - it's so much fun to be the recipient of a sewing gift!

I'm still making my way through some of the projects that have been linked up - if you have sewn with lace and want to share please add your link below!


Thank you again for sharing your time with us and I hope you enjoyed the creations as much as I did!  I've already added a few lace projects to my "to-do" list!

Saturday, January 18, 2014

Snowflakes & Lace - Sewing Mama RaeAnna and SewVery

Today is the day Veronica and I want to share our projects with you!


I'm so glad that Veronica could be my partner in crime on this series!  She has been such a blessing to me over the past year.  We were able to connect because of our love for sewing and blogging and we've become such great friends in real life.  In fact, our kids had a blast together at McDonald's yesterday and we were able to talk "shop" while they played!


I decided to go literal for my project! :) I made a lace snowflake applique on a sweatshirt tunic.   To create the top, I bought a 3XL sweatshirt and cut it up with pattern pieces from my Cupcake Top! 


I love my embroidery machine and have so much fun creating appliques and monograms.  I feel like I have a system in place for my process of hooping, pinning, etc. and that process got me in a little trouble when I made this sweatshirt!


 I normally take a project off the hoop, trim the stabilizer and then add cloud cover to the back of the shirt so any threads on the back won't scratch the child that wears the shirt!  To add the smooth backing you use a hot iron.  Hot irons + lace = disaster!  When I was using the iron on the back everything was ok - when I flipped the shirt over I was just in automatic pilot and didn't even think as I started pressing the front of the sweatshirt!  Yikes!  I burned a few little sections of the lace but fortunately was able to fix with some creative placement of lace and Hot Fix crystals!


See?!  You can barely tell I made an oopsie!

Eva Mae looks so cute in her little tunic.  We went to a cute antique store after our photoshoot and I showed off her tunic to the lady that sold me some pretty vintage lace trim!

I'll be giving away a yard of vintage lace trim to one of the winners of our giveaway!  Make sure you enter below for your chance to win!
a Rafflecopter giveaway

Tune in tomorrow for a round up post of all the guests on our series!  And if you have a project with lace I would love to see it added to our link party!  I'm visiting each entry and pinning to our Pinterest board. 

 To enter the link party and see all the details of the giveaway CLICK HERE
To view our Pinterest board CLICK HERE


See you tomorrow!

LinkWithin

Related Posts Plugin for WordPress, Blogger...