Pages

header2

Image Map

adsense

Monday, September 24, 2012

Week 3 White Sheet Challenge


Ok, so I am really hoping that by the end of the week I can share this dress in a picture ON the beach!!!  I gave my friend the dress last week to take on vacation!  Her daughter is a month older than Eva Mae and is planning to wear it for beach pictures in Florida! :)

Project Run & Play has such fun themes this season and I was excited to find this sheet at Ross that had a delicate lace trim already on the sheet!!!  I'll post a tutorial in a few days with how I smocked the top panel.

(Of course there are some mistakes in the design - I don't know how the ladies of smocking guild have such patience for this craft!!!
 Here are pics of my beautiful model! :)


Come back soon for a tutorial! :)
 

Wednesday, September 19, 2012

Guest posting Ruffleump costume tutorial


Monday, September 17, 2012

Project Run and Play - Week 2 - Designer

 
I was so excited about this week's challenge!!!  It didn't take me long to think of a designer that I really agree with the "aesthetic" - that designer is Mila Hermanovski (or just Mila....if you asked me her last name I would probably say "Hermanamanah" or some other form of jibberish!!! lol!)

I think as a person she is really rough around the edges and most likely would never be someone that I could be friends with.  However, each week on her season of Project Runway I really looked forward to see what she was going to create!  I know the whole season she really wasn't taken too seriously - colorblocking = high fashion? Maybe not so much.  But everyone has their own likes and dislikes! I personally like it! :)

Here are a few examples of her work:


I think her stuff is so fun!  You can search through old blogs and news articles to read more about her designs!  This one stood out to me as my inspiration for my dress:


I just love yellows and grays!!!  I wanted to create a color block dress with stripes and I had a cute yellow/gray print already in my stash that could work great with my concept!

Get ready for a long post!!!

So the first thing I did was take a gray and a yellow pillowcase and cut 3" strips on the bias.  I took all those strips, lined them up and sewed them together to get my stripe fabric.

I cute out the left side of the dress front


Then, piecing together a strip down the middle and a block on the bottom left of the dress I "color blocked" the front panels.


Here's the back view


I didn't want to do all the work of piecing the stripes of bias strips again so I just did a simple color block back with the gray pillowcase and print


So I have a front and back and now I need a front and back lining.  I used the yellow and gray print for the lining!


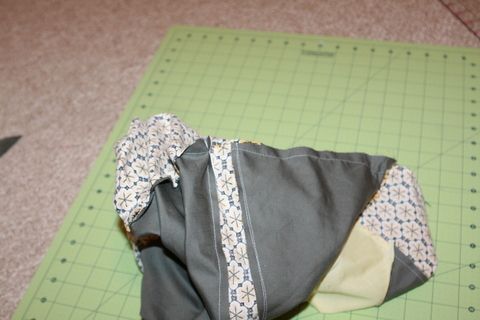
To put the dress together sew the side seams of the front and back on both the main fabric and the lining fabric.


Leave a 3" hole in one of the lining sides to turn the dress right side out at the end.


Press all the seams open (in this pic you see the hole in the lining.)


Now, put the lining and dress right sides together.


Here's what it looks like when you're looking down at the dress.


Sew all the way around the arms and neck


Turn right side out and press!


Top stitch the arms and neck!


Now, to close up the bottom of the dress, pin the right sides together all the way around the bottom.  It looks really wonky but you're doing it right! :)


Find that open seam in the lining and turn the dress right side out!


Press and top stitch along the bottom!!!  Add button holes and buttons and you're finished!


Self binding blanket and machine embroidery

Go check out my first guest post over at A Couple of Craft Addicts!!!


Thank you so much Jessica and Heather!!!  I hope your readers enjoy!
I was featured on A Couple of Craft Addicts

Thursday, September 13, 2012

embroidery machine oopsy


First of all, I have to say I LOVE how it looks on this ruffle shirt!  But I am so mad at myself that I couldn't do the pumpkin like I originally wanted!  When I put the hoop on the machine to start I didn't realize the arm wasn't all the way connected so the hoop was not aligned correctly.  I was able to do the outline of the pumpkin applique fine but when it came to the embroidery stitches around the edge (called a satin stitch) I was off with alignment and it wouldn't have looked right. :(  So, I decided to leave it, do the embroidery for her name and then go around the edges with some embroidery floss I had leftover from Christian's smocked Easter outfit of 2010.  I think it looks adorable and can't wait for cool weather to dress her up in her new shirt!  I was going to make some pants but I think I might just put some hot pink leggings on to bring out the pink in the fabric - and let the pumpkin bring out the orange!  I sense a fall photoshoot coming on soon!!! LOL!
 
Posted by Picasa

Wednesday, September 12, 2012

Ruffle T-shirt Tutorial


 I was visiting with my friend who gave me an adorable ruffle shirt to applique and embroider and we talked about wanting to make them ourselves!!!  We admired the really narrow hems (something I have yet to master) and adorable cascading ruffles!!!  I thought it wouldn't be too hard to replicate so I challenged myself this evening with creating one!!!  I hope you enjoy this tutorial and Kala, I hope I see one from you soon!!! :)

Here's what you'll need:
T-shirt
Three 4" strips of fabric by approximately 44"
(basically you'll want 3/8 yard of fabric if you're going to the fabric store to buy your ruffles!)
Thread
Sewing Machine
OPTIONAL but convenient: a serger and rotary cutter and mat!

First, take your t-shirt and cut it as shown in this picture!  We will attach the ruffle to each bottom piece before we reconstruct it. 

Take your 3 ruffle pieces and sew the short sides together to create a long loop.  Hem the bottom of the fabric and add a basting stitch to the top of the fabric.  Do this for each of the three pieces.
Then, gather the basting stitch and pin right sides together at the bottom of each t-shirt piece.
 

Sew along about 1/4" from the raw edge, being careful not to stretch the t-shirt material.


Now, pin the middle section to the top section and sew together.  Do the same for the bottom section to the middle section.


If you have a serger, serge each raw edge to finish the seams!


Now you have an adorable ruffle shirt!!!  I plan to add a cute pumpkin or turkey to mine for my daughter's Thanksgiving outfit!!!  I'm also going to make a pair of knit ruffle leggings to match.  I'll have to post a tutorial for that in the next few weeks!!!   Stay tuned next week for my Project Run and Play Week 2 post! :)

150x200


LinkWithin

Related Posts Plugin for WordPress, Blogger...